Success in real estate is determined by one metric: time spent in front of clients. If you spend your afternoon resizing photos for the MLS or chasing down signatures for a disclosure form, you are essentially paying yourself an administrative wage while missing out on five-figure commissions. A virtual assistant for real estate agents acts as the operational engine that handles the repetitive, time-consuming tasks that keep your business running but keep you away from the closing table.
By delegating these workflows to a specialized Real Estate Virtual Assistant, you reclaim the 15 to 20 hours a week usually lost to administrative debt. In a market as competitive as 2026, the agents who win are those who focus entirely on relationship building and high-level negotiation. A strong Property Management VA can also support listing coordination, tenant communication support, vendor follow-up, calendar control, and database organization for teams handling both sales and property-related workflows. Virtual Nexgen Solutions has provided this competitive edge since 2016, delivering tailored support for real estate agencies, dependable 24/7 reliability, and highly trained professionals starting at just $8 per hour.
When agents search for the best virtual assistant for real estate agents, they usually want one thing: more closings without more chaos. That only happens when the assistant understands real estate operations, not just generic admin work. The right Real Estate Virtual Assistant protects lead response time, strengthens follow-up, keeps listings current, and prevents contract delays that damage trust with clients and cooperating agents.
This matters even more now. Buyers expect faster communication. Sellers expect stronger listing promotion. Brokerages expect tighter documentation. If your backend is disorganized, your front-end growth slows down fast. That is why a specialist VA is no longer optional for many agents. It is a strategic capacity move.
6 Daily Pain Points Killing Your Real Estate Growth
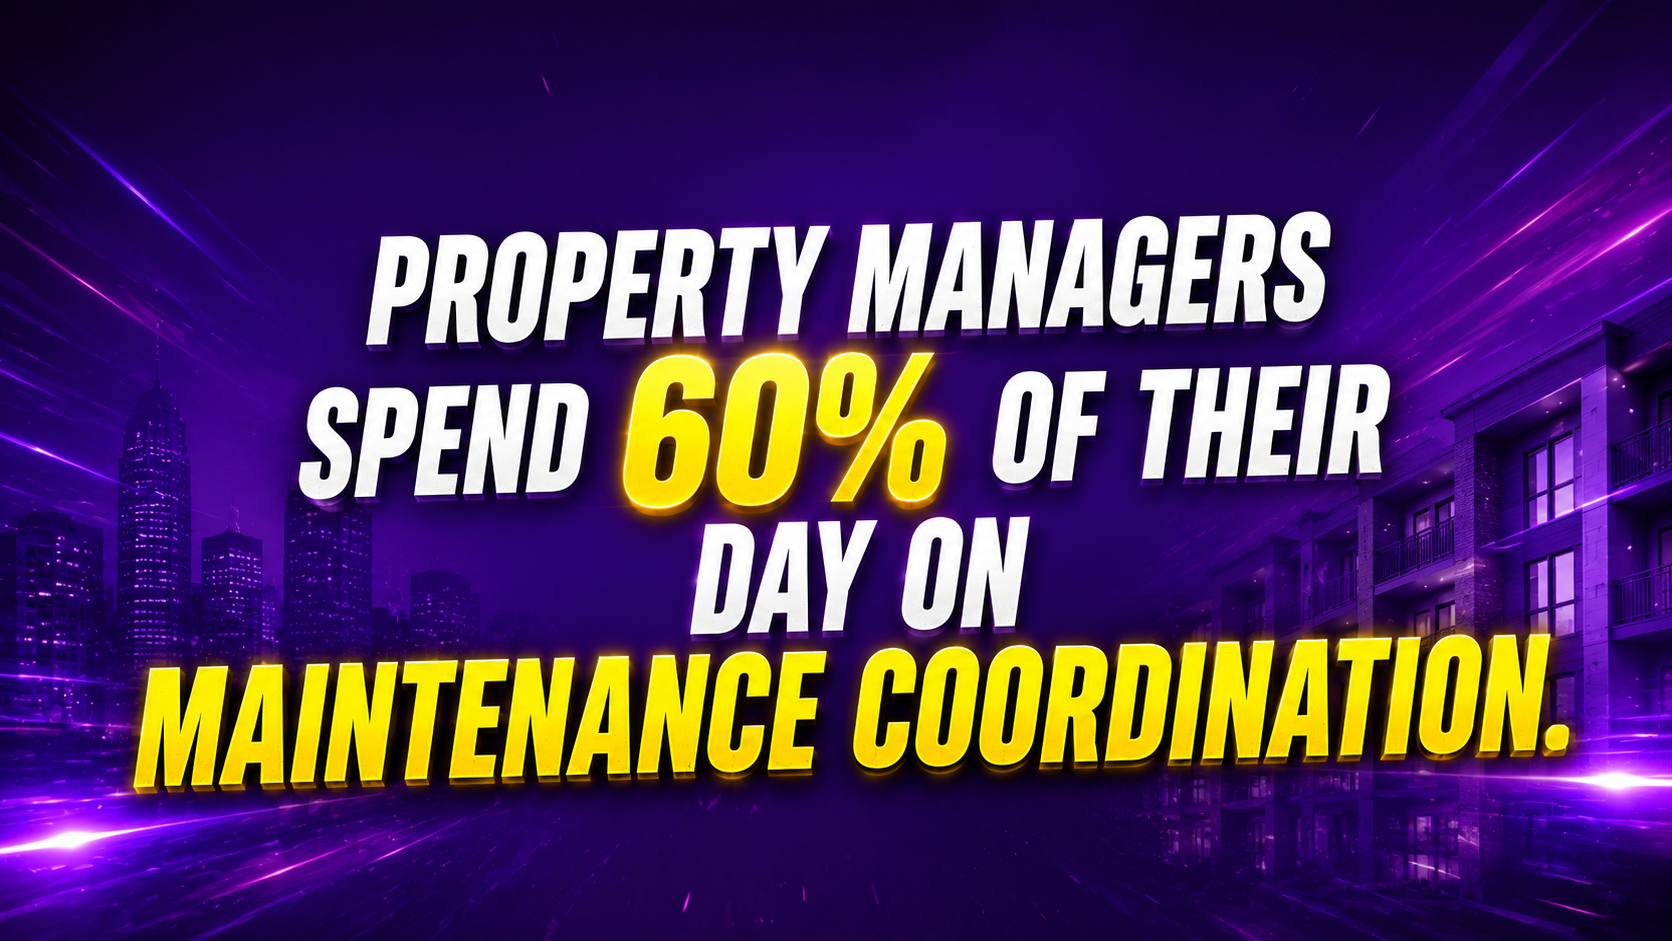
Most agents hit a "commission ceiling" not because they lack talent, but because they lack capacity. If you experience these six daily frustrations, you have reached the point where hiring a Property Management VA or administrative assistant is no longer a luxury, it is a survival requirement.
- The Lead Leakage Problem: Leads from Zillow, Realtor.com, or your website sit for hours or days without a response because you are busy in showings.
- The Transaction Paperwork Loop: Missing signatures and incomplete folders delay closings and frustrate title companies.
- CRM Neglect: Your database is a digital graveyard of "dead" contacts because you don't have the time to perform consistent follow-ups.
- Social Media Silence: Your online presence is inconsistent, causing potential sellers to doubt your marketing prowess.
- Calendar Chaos: Double-booked appointments and forgotten follow-up calls damage your professional reputation.
- Listing Maintenance Fatigue: Updating price changes, status updates, and open house details across multiple platforms consumes your entire morning.
10 Specific Tasks a Real Estate VA Handles for You
A Real Estate Virtual Assistant from Virtual Nexgen Solutions is not a generalist. They are trained in the specific language and workflows of the property industry. Here are ten tasks you can offload immediately to stay focused on your revenue-generating activities:
- Lead Scrubbing: Qualifying incoming leads and organizing them by priority within your CRM.
- MLS Management: Entering new listings, uploading high-res photos, and ensuring descriptions are compliant with local board rules.
- Transaction Coordination: Serving as the liaison between the buyer, seller, lender, and escrow to ensure every document is signed on time.
- Market Research: Compiling Comparative Market Analysis (CMA) data for upcoming listing presentations.
- Direct Mail Coordination: Managing your "Just Listed" and "Just Sold" postcard campaigns through vendors.
- Appointment Setting: Managing your cold calling or warm lead follow-up to fill your calendar with listing appointments.
- Video Editing: Clipping your property walkthroughs for Instagram Reels, TikTok, and YouTube Shorts.
- Feedback Collection: Calling agents who showed your property to get feedback for your sellers.
- Database Mining: Contacting past clients for referrals and updating their current contact information.
- Expense Management: Tracking your marketing spend and commission splits for tax preparation.
Beyond those core tasks, a specialist VA also supports the hidden work that drives consistent production. They keep lead pipelines clean, enforce follow-up discipline, reduce listing launch errors, and preserve your reputation with clients, lenders, title companies, and cooperating agents. That is the difference between random delegation and real operational support. A strong virtual assistant for real estate agents should remove friction at every stage of the client journey, from first inquiry to post-closing follow-up.
12 Detailed SOPs for Real Estate Efficiency
To maximize the ROI of your virtual assistant for real estate agents, you must provide clear, step-by-step instructions. At Virtual Nexgen Solutions, we implement the following Standard Operating Procedures (SOPs) to ensure consistent performance for real estate agencies, teams, brokers, and independent agents. Each workflow is designed to protect response speed, reduce avoidable errors, and create a more scalable business.
1. Lead Intake & CRM Entry
Objective: Capture every lead accurately, respond fast, and assign the next action before the lead goes cold.
Use this SOP when: A new lead comes in from Zillow, Realtor.com, Facebook Lead Ads, Google PPC, your website, open houses, referrals, sign calls, or property portals.
Step-by-step process:
- Watch lead sources continuously. Monitor CRM notifications, website forms, email inboxes, and platform alerts throughout the assigned shift.
- Open the lead record immediately. Review source, timestamp, property of interest, contact details, and message content.
- Verify complete contact information. Check name spelling, phone number format, email validity, and property interest details.
- Create or update the CRM contact. Enter the lead into Follow Up Boss, Chime, BoomTown, LionDesk, or your preferred CRM using the correct source tag.
- Apply standard tags. Tag by source, buyer or seller intent, geography, price range, urgency, and campaign type.
- Send the first touch quickly. Text or email using the approved script within minutes of intake.
- Attempt a live call. Call the lead to determine timeline, financing status, location preference, and whether they are already working with an agent.
- Score the lead clearly. Mark the lead as Hot, Warm, Nurture, or Cold based on urgency and fit.
- Assign the next action. Set a task for agent callback, VA nurture follow-up, property send, or appointment booking.
- Log every interaction. Record call attempts, texts sent, disposition notes, and next follow-up date inside the CRM.
Best practices:
- Use the same disposition labels every time.
- Keep notes short, factual, and easy to scan.
- Never leave a new lead without a next step.
- Escalate immediately if a high-intent seller requests a listing consultation.
2. Calendar Management & Showing Coordination
Objective: Protect the agent’s time, eliminate double-booking, and keep buyers, sellers, and showing agents informed.
Use this SOP when: Coordinating listing appointments, buyer tours, inspections, open houses, price review calls, and internal team meetings.
Step-by-step process:
- Check the master calendar first. Open Google Calendar or Outlook and review current appointments, travel gaps, and buffer times.
- Confirm appointment type. Identify whether the request is a listing presentation, buyer showing, final walk-through, inspection, staging visit, or contractor meeting.
- Collect all logistics. Record address, client name, best phone number, time preference, lockbox or gate details, and expected duration.
- Compare with route efficiency. Group nearby showings together to reduce wasted drive time.
- Coordinate with clients and cooperating parties. Contact sellers, buyers, showing agents, or tenants to confirm preferred time windows.
- Book the appointment formally. Add the event to the calendar with full notes, map link, client status, and any special access instructions.
- Send confirmations. Deliver text and email confirmations to everyone involved.
- Set reminders. Schedule reminder alerts for the agent and client 24 hours before and again 1 to 2 hours before the appointment.
- Update if changes occur. Move or cancel appointments immediately when conditions change.
- Close the loop. Confirm that the agent has all files, MLS sheets, or disclosures needed before the meeting begins.
Best practices:
- Build buffer time between appointments.
- Confirm occupied listings twice.
- Include showing instructions in every event note.
- Alert the agent immediately if timing changes affect a high-value client.
3. MLS Listing Management
Objective: Publish accurate, compliant, and market-ready listings without data errors or missing assets.
Use this SOP when: Launching a new listing, updating price changes, changing status, posting open houses, or revising remarks.
Step-by-step process:
- Collect the listing file. Gather signed paperwork, property details sheet, seller disclosures, photography, video links, floor plans, and agent notes.
- Review brokerage requirements. Confirm mandatory fields, branding rules, and compliance standards for your MLS and brokerage.
- Create the listing draft. Start a new draft in Matrix, FlexMLS, Paragon, or the local MLS system.
- Enter property data carefully. Input address, tax details, lot size, square footage, room counts, upgrades, school information, and remarks.
- Upload media in sequence. Add photos in the approved order, select the best cover image, and attach virtual tour links where allowed.
- Proofread every field. Check spelling, parcel details, showing instructions, compensation fields, exclusions, and occupancy notes.
- Send draft for review. Share the listing preview with the agent for final approval before publishing.
- Go live on schedule. Publish the listing at the approved launch time.
- Distribute supporting assets. Save the MLS sheet, public link, and photo folder for social media, email, and brochure use.
- Maintain listing accuracy. Update status changes, price reductions, open house times, and sold information immediately.
Best practices:
- Follow fair housing standards in listing remarks.
- Never guess missing data.
- Keep a pre-launch checklist for every listing.
- Recheck the public-facing version after publication.
4. Transaction Coordination (Contract-to-Close)
Objective: Keep every transaction on track, fully documented, and moving toward closing without missed deadlines.
Use this SOP when: A buyer or seller goes under contract and the file must move through inspections, financing, title, and closing.
Step-by-step process:
- Open the transaction file. Create the folder in Dotloop, SkySlope, Google Drive, Dropbox, or the brokerage compliance system.
- Upload executed documents. Save the contract, disclosures, agency forms, addenda, and contact sheet in the correct order.
- Build the deadline tracker. Record earnest money due date, inspection period, appraisal timeline, financing contingency, title deadlines, and closing date.
- Introduce all parties. Send a professional intro email to client, lender, title or escrow officer, cooperating agent, and internal team members.
- Monitor signatures and missing documents. Check daily for incomplete files and request missing items fast.
- Schedule milestone reminders. Send reminders before inspections, appraisal, loan commitment, utility transfer, walk-through, and closing.
- Update the agent proactively. Flag risks such as delayed appraisal, lender silence, repair negotiation delays, or title issues.
- Maintain the compliance file. Upload final versions of every document to the brokerage portal.
- Prepare for closing week. Confirm closing statement timing, final utility details, and walk-through logistics.
- Archive after closing. Mark the file closed, store final documents, and trigger post-close follow-up tasks.
Best practices:
- Use one transaction checklist per file.
- Name documents consistently.
- Confirm every deadline in writing.
- Escalate delays before they become emergencies.
5. Social Media Management for Listings
Objective: Turn listing inventory into consistent visibility, inbound inquiries, and stronger seller confidence.
Use this SOP when: Promoting new listings, price improvements, open houses, pending announcements, sold properties, neighborhood content, or brand-building posts.
Step-by-step process:
- Build a monthly content plan. Review upcoming listings, open houses, local events, and evergreen topics.
- Gather property assets. Organize photos, videos, captions, property details, map highlights, and agent talking points.
- Create branded content. Design graphics, reels, carousel posts, story slides, and teaser clips in Canva using approved templates.
- Write platform-specific captions. Tailor copy for Instagram, Facebook, LinkedIn, and short-form video descriptions.
- Include clear response pathways. Add CTA language such as DM for details, text for the price sheet, or click the listing link.
- Schedule posts strategically. Queue content at the times your audience is most active.
- Monitor engagement daily. Respond to comments, flag DMs, and route serious inquiries to the agent fast.
- Refresh content for active listings. Repost with new angles, feature highlights, or neighborhood hooks when a listing stays active.
- Track content performance. Note top-performing listing posts, saves, shares, and inquiry counts.
- Report results weekly. Share what content generated reach, engagement, and conversations.
Best practices:
- Lead with the strongest visual.
- Keep branding consistent across every listing.
- Mix listing promotion with educational content.
- Maintain compliance with local advertising rules.
6. Email Marketing & Newsletter Distribution
Objective: Keep the database warm, create repeat visibility, and generate listing, buyer, and referral opportunities from past and current contacts.
Use this SOP when: Sending monthly newsletters, listing blasts, market updates, open house invites, farming campaigns, or past-client check-ins.
Step-by-step process:
- Segment the audience first. Separate buyers, sellers, investors, past clients, cold leads, sphere, and neighborhood farm lists.
- Clean the contact list. Remove duplicates, fix formatting issues, and verify unsubscribed contacts are excluded.
- Choose the campaign goal. Decide whether the email is for education, listing promotion, re-engagement, referrals, or event attendance.
- Draft the content clearly. Write a strong subject line, concise preview text, body copy, and one primary CTA.
- Insert branded visuals. Add listing photos, headshots, logos, or market snapshots without making the email too heavy.
- Build the campaign in Mailchimp, Constant Contact, or your CRM email system.
- Test before sending. Review mobile formatting, links, personalization fields, and image display.
- Schedule the send. Choose the best day and time for your audience segment.
- Track campaign performance. Review opens, clicks, replies, and unsubscribes.
- Create follow-up actions. Move engaged contacts into a call list, nurture sequence, or listing appointment workflow.
Best practices:
- Use one main CTA per email.
- Keep copy easy to scan.
- Segment by intent, not just by source.
- Re-engage inactive contacts with a separate campaign.
7. Property Research & CMAs
Objective: Give the agent accurate market data for pricing, buyer guidance, listing consultations, and investor conversations.
Use this SOP when: Preparing a CMA, seller net sheet input, neighborhood update, pricing review, buyer strategy packet, or investment screening summary.
Step-by-step process:
- Clarify the purpose. Determine whether the research supports a listing presentation, buyer offer strategy, price reduction review, or investor analysis.
- Pull core property details. Confirm bed/bath count, square footage, lot size, year built, condition, upgrades, HOA, and tax data.
- Search the right comparables. Pull active, pending, sold, expired, and withdrawn properties in the nearest practical radius.
- Match the comps carefully. Filter by property style, age, size range, neighborhood, school zone, and condition.
- Review pricing patterns. Compare list price, sold price, days on market, concessions, price drops, and active competition.
- Prepare the CMA package. Organize top comps, adjustment notes, and market observations in the agent’s preferred format.
- Flag market realities. Note oversupply, weak showing activity, aggressive pricing nearby, or demand pockets.
- Verify all numbers. Recheck public record conflicts, duplicate sales, and outlier properties.
- Deliver in advance. Send the final packet at least 24 hours before the appointment whenever possible.
- Store the research. Save the report in the client folder for later review and pricing conversations.
Best practices:
- Avoid using poor comp matches to force value.
- Highlight trends, not just averages.
- Keep notes clear enough for fast agent review.
- Update stale CMAs before the appointment.
8. Feedback Collection from Showings
Objective: Help sellers understand market response and help agents adjust price, presentation, or positioning quickly.
Use this SOP when: A property has active showings, open house traffic, or stalled activity that requires feedback analysis.
Step-by-step process:
- Review showing activity daily. Check ShowingTime or your scheduling platform for completed appointments.
- Build the feedback list. Record the name, brokerage, phone number, email, and showing date for each agent who visited.
- Send the first request fast. Send a polite email or text within hours of the showing while the visit is still fresh.
- Follow up with a call if needed. Call non-responders the next business day.
- Ask structured questions. Request feedback on price, condition, layout, location perception, and buyer objections.
- Log responses in one place. Save all comments in a shared spreadsheet, CRM note, or seller report template.
- Identify patterns. Look for repeated concerns about price, odor, updates, curb appeal, traffic noise, or room size.
- Prepare a seller summary. Convert raw comments into a concise report with practical insights.
- Send the report to the agent. Deliver a clean summary before the seller update call.
- Track unresolved concerns. Note feedback themes that persist across multiple weeks.
Best practices:
- Stay professional with every showing agent.
- Ask for specifics, not vague impressions.
- Separate one-off comments from repeated market signals.
- Keep the seller report factual and calm.
9. Database Clean-up & Tagging
Objective: Turn a messy CRM into a usable sales asset that supports follow-up, referrals, and smart segmentation.
Use this SOP when: The CRM contains duplicates, stale data, missing tags, incomplete follow-up tasks, or old lead imports.
Step-by-step process:
- Export or review the full database safely. Work from the live CRM or a recent backup.
- Identify duplicates first. Merge duplicate contacts carefully to preserve notes and timeline history.
- Standardize name and phone formatting. Fix capitalization, state abbreviations, and phone number structure.
- Check email validity. Remove obvious errors and mark bounced addresses for correction.
- Tag by relationship type. Classify contacts as buyer, seller, investor, past client, sphere, vendor, agent, tenant, or landlord where relevant.
- Tag by lead stage. Add statuses such as new lead, nurture, active client, under contract, closed, or archive.
- Assign geography and source tags. Include neighborhood, city, ZIP, lead origin, and campaign source.
- Set missing next actions. Add a follow-up date to any viable contact without one.
- Remove dead weight responsibly. Archive contacts that are invalid, irrelevant, or clearly unworkable.
- Document the clean-up rules. Maintain a short tagging standard so future entries stay consistent.
Best practices:
- Clean in batches by segment.
- Never mass-delete without review.
- Keep tagging simple enough to maintain.
- Build a weekly database maintenance rhythm.
10. Appointment Setting for Cold Leads
Objective: Re-engage older leads and convert overlooked contacts into conversations and qualified appointments.
Use this SOP when: Working old internet leads, stale seller inquiries, unresponsive open house leads, abandoned valuation requests, or long-term nurture lists.
Step-by-step process:
- Build the outreach list. Pull cold leads by age, source, geography, or last activity date.
- Review past notes first. Check prior interactions so the outreach feels informed, not random.
- Use a structured outreach sequence. Start with text, call, voicemail, and follow-up email based on the approved cadence.
- Open with relevance. Reference the original property inquiry, area of interest, or request they submitted.
- Qualify current intent. Ask whether they are still planning to buy, sell, invest, rent, or simply gathering information.
- Handle common objections professionally. If timing is unclear, ask permission to follow up later and confirm preferred timing.
- Book the next step immediately. Schedule a buyer consultation, listing call, or property tour when interest is confirmed.
- Update CRM status live. Change disposition, timeline, and next action during or right after the conversation.
- Move non-ready leads into nurture. Tag and sequence them for future follow-up.
- Report booked appointments daily. Share confirmed meetings and high-potential conversations with the agent.
Best practices:
- Keep outreach respectful and concise.
- Use approved call scripts, but sound human.
- Track contact attempts carefully.
- Focus on booking conversations, not forcing decisions.
11. Expense Tracking & Bookkeeping Prep
Objective: Organize financial records so the agent or bookkeeper can review expenses, commissions, and reimbursements without chasing receipts.
Use this SOP when: Tracking monthly business spending, marketing costs, mileage support data, vendor payments, transaction expenses, and bookkeeping preparation.
Step-by-step process:
- Create the monthly expense file. Set up folders or spreadsheets by month and category.
- Collect source documents. Gather receipts, invoices, card statements, software subscriptions, ad spend reports, and contractor bills.
- Categorize expenses consistently. Label items such as marketing, MLS dues, signs, staging, photography, client gifts, gas, office supplies, and vendor payments.
- Enter records into the tracking sheet. Record date, vendor, description, amount, payment method, and category.
- Match receipts to transactions. Confirm that every major expense has supporting documentation.
- Flag unclear items. Ask the agent for clarification on unusual or uncategorized charges.
- Track commissions and splits. Record gross commission, brokerage split, referral fee, and net proceeds for closed deals where requested.
- Prepare the summary report. Build a month-end snapshot for the agent or accountant.
- Store documents securely. Save everything in the agreed folder structure for tax and bookkeeping reference.
- Submit for final review. Hand off the prepared records to the bookkeeper, CPA, or agent for approval.
Best practices:
- Update expenses weekly, not quarterly.
- Keep naming conventions consistent.
- Separate personal and business spending clearly.
- Never estimate missing financial details.
12. Review Management & Client After-Care
Objective: Turn closed transactions into stronger reputation, repeat business, referrals, and long-term client loyalty.
Use this SOP when: A transaction closes and the client enters the post-close relationship phase.
Step-by-step process:
- Confirm the closing is complete. Verify funding, recording, key transfer, and final transaction status.
- Update the client record. Change the CRM stage to closed and add closing date, property address, and service notes.
- Send a thank-you message. Deliver a personalized email or text from the agent within the post-close window.
- Request the review at the right time. Send review links for Google, Zillow, Facebook, or other priority platforms while satisfaction is high.
- Make it easy to respond. Include direct links and simple instructions.
- Track review status. Mark whether the request was sent, opened, completed, or still pending.
- Follow up once or twice. Send polite reminders if the client has not responded.
- Log testimonials for reuse. Save strong reviews in a shared folder for website and marketing use with proper approval.
- Schedule after-care touches. Add house anniversary reminders, referral check-ins, and seasonal home-care messages.
- Maintain the relationship. Keep past clients inside a long-term nurture calendar so they stay connected to the agent’s brand.
Best practices:
- Request reviews while momentum is fresh.
- Personalize thank-you communication.
- Never send broken review links.
- Treat after-care as part of the sales system, not an extra.
These SOPs create consistency where most agents struggle: speed, follow-up, file control, and visibility. They also make delegation easier because the VA is not guessing what success looks like. Instead, every recurring task follows a defined standard. That is how a Real Estate Virtual Assistant becomes a growth asset rather than just an extra set of hands.
For teams managing rentals, investor portfolios, or light operational support beyond sales, a trained Property Management VA can adapt many of these same SOPs for tenant communication logs, maintenance coordination support, vendor follow-up, and document organization. The principle stays the same: define the process, assign ownership, track execution, and protect the agent’s time.
Software and Tools Your Real Estate VA Must Master
At Virtual Nexgen Solutions, our team is proficient in the industry-standard tools required to run a high-volume agency. We ensure your Real Estate Virtual Assistant can step in on day one using your existing stack:
- CRMs: KW Command, Follow Up Boss, LionDesk, Chime, and BoomTown.
- Transaction Tools: DocuSign, Dotloop, and SkySlope.
- Marketing & Design: Canva Pro, Constant Contact, and Mailchimp.
- MLS Platforms: Matrix, Paragon, and FlexMLS.
- Communication: Slack, Zoom, and RingCentral.
- Project Management: Trello, Asana, and Monday.com.
A capable VA should not need a long runway to become useful. They should understand how to work inside your tools, follow naming conventions, protect data accuracy, and communicate clearly across your team. That matters because software alone does not fix operational gaps. Execution does. A specialist virtual assistant for real estate agents brings structure to the systems you already pay for.
For credibility and market context, it also helps to track broader housing conditions and mortgage movement when supporting agent communication and market updates. Use reliable sources such as the National Association of Realtors and Freddie Mac mortgage market data when preparing market-facing content or internal pricing conversations.
Why Real Estate Agencies Choose Specialist VA Support
Real estate businesses do not fail because agents lack hustle. They stall because administrative drag compounds over time. Every delayed lead response, untagged contact, missed deadline, stale listing update, and unreturned showing feedback request chips away at revenue. The most effective agencies treat backend support as a strategic function, not an afterthought.
That is where Virtual Nexgen Solutions stands out. Since 2016, the company has supported businesses with tailored VA solutions built around real workflows, not generic task lists. For real estate agencies, that means support that fits the way your team actually operates. Some agents need aggressive lead response coverage. Some need contract-to-close discipline. Some need listing marketing support, database cleanup, and calendar control. The service should match the bottleneck.
The practical advantage is simple. You gain 24/7 reliability, documented processes, and a support model that can flex with your listing volume and client demand. Instead of hiring reactively after mistakes pile up, build capacity before growth starts slipping. That gives you room to take more appointments, maintain better client communication, and protect your brand when business gets busy.
If you are comparing providers, focus on three things. First, ask whether the assistant understands real estate terminology and transaction flow. Second, ask how they will follow your SOPs and reporting expectations. Third, ask how quickly they can support your existing tools, whether that is Follow Up Boss, Dotloop, Canva, ShowingTime, Google Workspace, or your local MLS environment. Those details shape whether the engagement saves time or creates more management work.
The Cost of Inaction: Why Waiting is Expensive
Many agents hesitate to hire real estate VA support because they view it as an expense. However, the true cost is the "opportunity cost" of your time. If you spend 10 hours a week on admin, and your hourly value (based on your commission goals) is $250, you are effectively paying $2,500 a week for clerical work.
By contrast, a Virtual Nexgen Solutions assistant at $8 per hour costs you only $80 for those same 10 hours. The $2,420 difference is pure profit that you can reinvest into your family or more marketing. More importantly, those 10 hours can be spent on four additional listing appointments per month, potentially adding six figures to your annual bottom line.
Whether you are an independent agent or a growing brokerage, our 24/7 availability and deep industry experience since 2016 make us the ideal partner. We provide the systems, the people, and the consistency you need to scale without the burnout.
Frequently Asked Questions
Can a virtual assistant for real estate agents access the MLS?
Yes, in many markets an assistant can be granted unlicensed or authorized support access based on local MLS and brokerage rules. Confirm your board’s policy first, then assign only the permissions needed for draft entry, updates, and reporting.
What makes a specialist Real Estate Virtual Assistant better than a general admin assistant?
A specialist understands lead routing, listing launch timing, showing coordination, transaction deadlines, CRM tagging, and client communication standards specific to real estate. That reduces training time and lowers the risk of avoidable mistakes.
Can a VA help both sales agents and teams with property-related workflows?
Yes. A strong VA can support buyer and seller operations, and a Property Management VA can also assist with document organization, vendor follow-up, calendar handling, reporting support, and tenant communication logs when those tasks fall within your process.
How quickly should a virtual assistant for real estate agents respond to new leads?
The target should be minutes, not hours. Fast first response improves contact rates and protects marketing spend. The exact SLA depends on your business model, but most serious teams aim for immediate intake and same-shift follow-up.
Is it legal for a VA to make calls and set appointments?
In many cases, yes, as long as the VA is not performing licensed activities or discussing matters that require a licensed real estate professional. Keep scripts and boundaries clear, and always follow your state commission rules.
How do I manage quality when delegating so many moving parts?
Use SOPs, shared dashboards, tagged CRM workflows, daily reporting, and weekly review calls. Clear process ownership matters more than micromanagement. When expectations are documented, delegation becomes much easier to scale.
Why do agencies choose Virtual Nexgen Solutions for real estate support?
Virtual Nexgen Solutions has delivered tailored VA support since 2016, offers 24/7 reliability, and builds service around each agency’s real bottlenecks instead of offering one-size-fits-all help. That approach is especially valuable for agents who need support across leads, listings, transactions, and after-care.
How much does a Real Estate Virtual Assistant cost?
Virtual Nexgen Solutions offers support starting at $8 per hour, giving agencies a practical way to add skilled operational capacity without the overhead of a full-time in-office hire.
Ready to reclaim your time and protect more revenue-producing hours? Explore how tailored support can fit your workflow at Virtual Nexgen Solutions or schedule a 30-minute growth strategy call here to map out the next bottleneck in your real estate